Not just repurposing, but BEING repurposed......" if anyone is in Christ, he is a new creation: the old has gone, the new has come." ~~ 2 Corinthians 5:17


Showing posts with label industrial. Show all posts

Saturday, April 2, 2011

Roofing Wind Turbine Project #2

So I'm happy to present my second project from my roofing wind turbines...

Perhaps you remember my first project from them.... 

And if you REALLY think back, you'll remember where this all started from.... 

And how I took them apart.... 

and how yucky some of the parts were!... 

It took a LOT of work and scrubbing (it was from a roof afterall -- tar -- EWWWW)....  

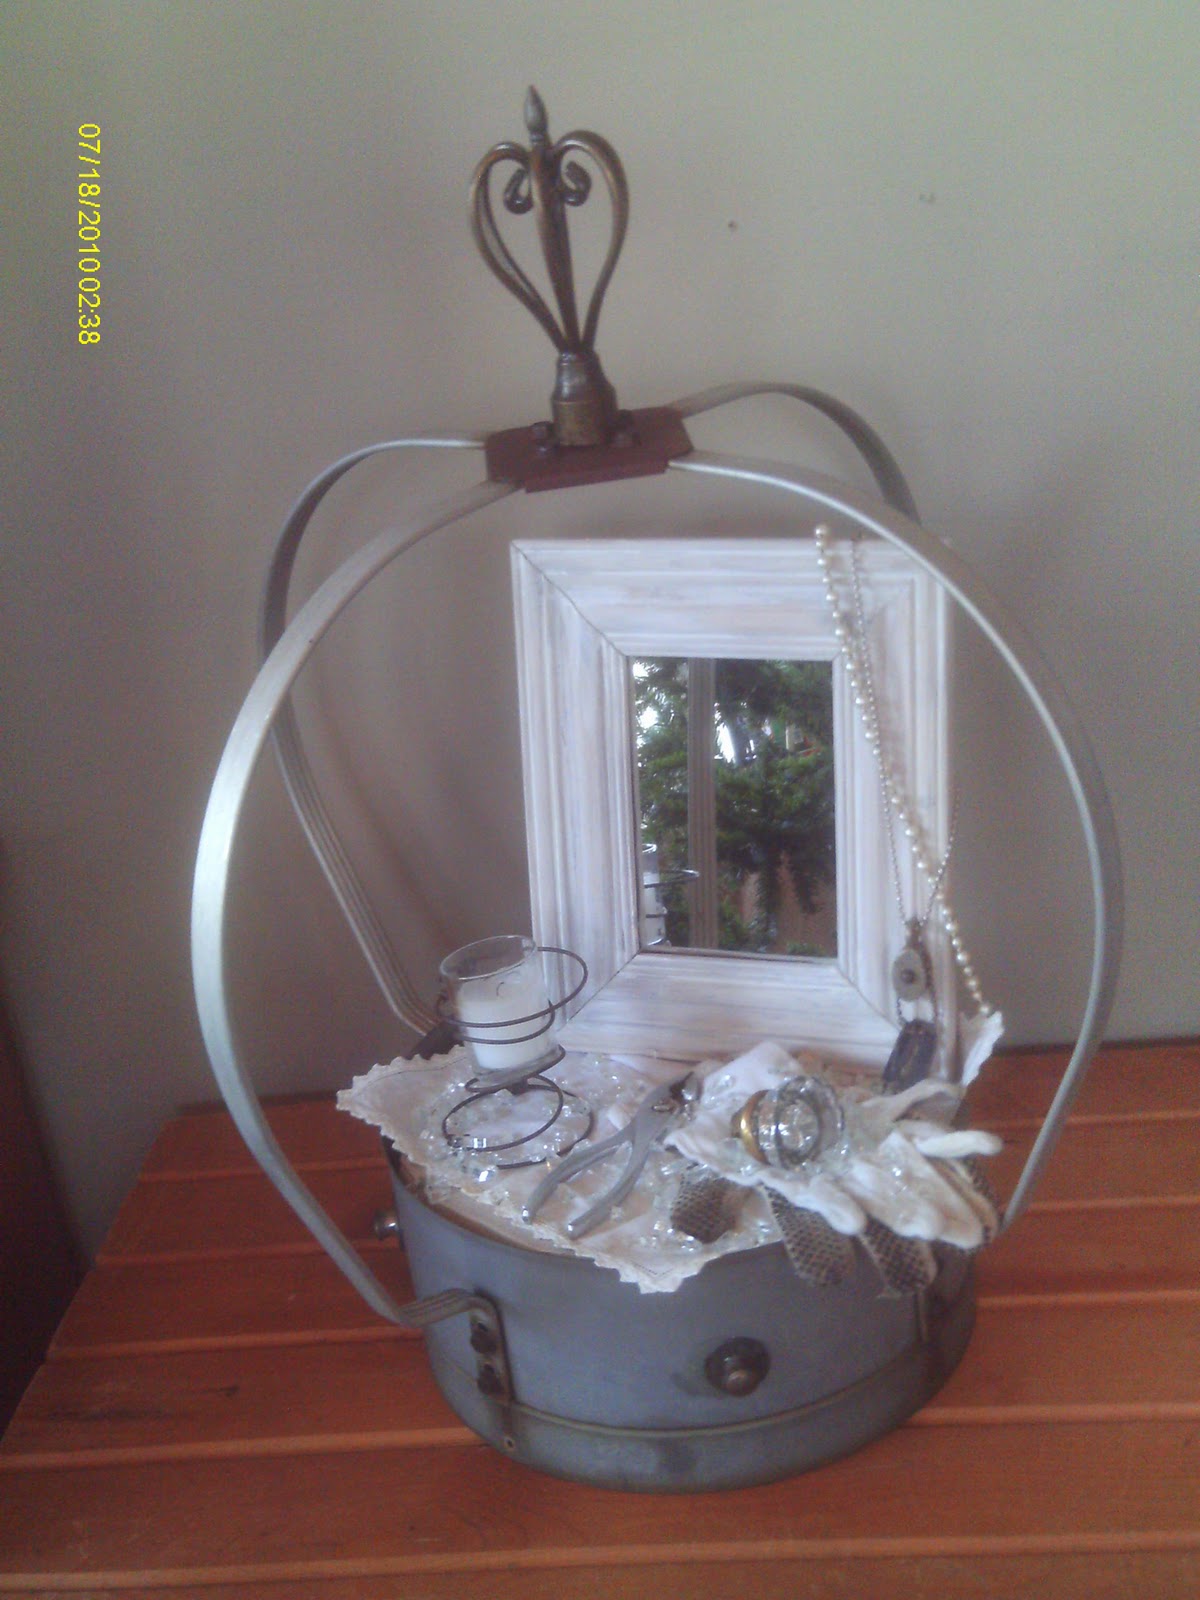
And one of the pieces I finally got from that was this... 

SOOO, I drilled a few small holes in the rim... 

Cut a thick piece of wood the size of the circular area... 

And did the same with a mirror (using my handy dandy new circular glass cutting tool, of course -- I LOVE THAT THING)....  

Then I put mirror adhesive on the wood to stick the two together... 

And after placing it inside the opening, I drilled some screws through the rim holes into the wood to hold everything in place... 

And it easily mounted onto the wall by simply nailing through the existing holes (with ROOFING NAILS, of course!)  

TA DA!  An industrial  mirror!...........next!! 

Midge

Thursday, March 31, 2011

Trying to be Industrious!

Thanks to my handy dandy glass cutting tool, I'm finally able to complete some projects I've been waiting on for a long time.  Like this industrial side table...

I have a few of these, but different sizes.  I don't know if they're wheels, pulleys, some kind of molds, or what!  But they're rustic, beefy, and very industrial looking.      

I've had this guy for quite some time, so he definitely needed a bath, followed by a good rubdown with some oil... 

I had always wanted it for a table, but never had a good vision for a base...until...I picked up a swivel office chair for a couple bucks at the Goodwill.  And then it hit me..duh... 

I not only removed the seat, but also ended up cutting off some of the metal from the chair base -- I didn't want any extra showing through.... 

And I didn't really like the finish on the metal, so I gave it a coating of black spray paint.  Much better.... 

Then I attached the two together from underneath by drilling some holes in the metal and running some screws.....  

TA DA... 

And then, using my new love, I mean my new handy dandy glass cutting tool... 

I cut and added a round piece of glass.  I wanted the table designed so you could see all the parts of the wooden piece....  

I ran a bead of silicone around to give a finished edge....  

And as my daughter reported to me...  

"It turned out super cool!" 
I guess I couldn't ask for a better endoresement than that.  

Midge

I'm linking this up to Becky's Under $100 Linky Party at Beyond the Picket Fence

And I'm linking this up to Donna's Saturday Nite Special Linky Party at Funky Junk Interiors

Tuesday, March 29, 2011

Not just a pipe dream!

So I bought a nifty little tool last week that I just love!  I think it's changed my life!  It cuts glass into circles! WHOA!!  I didn't even know there was such a thing.  But....there is, I have one, and I'm having fun!

It enabled me to put to use a piece I bought awhile back at an online auction.  Minimum bid is $5.00 (a pretty major investment for a Dutch girl like me), but I liked that it's so industrial, yet had great details, a hint of red, and was round -- I knew instantly what I would do with it.  So I bid, and at the end of the day is was still mine.  YIPPEE! 

It's actually a clamp for piping of some sort.  And pretty substantial pipes at that -- can you read that #?....6"....That's a pretty big pipe. 

And it's designed to open up and then clamp down -- perfect for what I had in mind! 

So I used a cardboard template to make sure to get just the right size I wanted for a circle.  Then I went ahead and used my handy dandy new tool to cut a circle from a mirror. 

In case later someone might unclamp it, I didn't want it entirely glued, so I set the mirror in the bottom half into some epoxy....  

then closed the top half and clamped down the handle.... 

TA DA!!

I hope I've given you something to reflect on.  Junking isn't all just pipe dreaming you know.

Midge

Saturday, February 26, 2011

Are you a junk queen?


A while back, I bought 3 of these turbines...  


Here's the closeup.  They're actually quite large.... 


I took them apart... 


And one of the parts looked like a crown.  Hey, royalty is in right now!  So I went with it.... 


Found these pieces:  a random curtain finial from my stash, 4 big washers, and 4 small metal knobbish things (I think from the insides of a piano)..... 


Attached them with epoxy to make it an official crown... 


Added a board I whitewashed white to provide a surface for display.... 


It could be useful on a buffet table.... 


On the bar.... 


As a centerpiece.... 


Or just use for a fun vignette!... 


What a great way to let the world know you're a Queen! -- A JUNK Queen.

So how about you?  Are YOU a junk queen?

Midge

I'm linking this up to Donna's SNS Linky Party #70 @ Funky Junk Interiors

Wednesday, February 9, 2011

Whatever way the wind blows these projects

First a little disclaimer:  If you're into the girlie, frilly, delicate stuff, this post may not be for you.  If you're into industrial -- ENJOY! 

Though I haven't been doing much blogging lately (oops!), I have been doing a bit of dabbling -- holiday stuff, mom stuff, house stuff, church stuff, etc.  But of course I didn't forget my true love -- JUNK!

I snagged these beauties up a while back.  All three rooftop wind turbines for $15.  A little more than I like to spend (afterall, I'm a scavenger), but when I considered it as $5 each, I could justify it. 
                                     

And they are quite large, check them out compared to that chair!

Here's one all ready to be operated on! --  Nurse, my screwdriver please!


The 2 top screws hold the "cage" to the turbine.  The other screw, along with its partner on the other side held them onto the bottom portion.  So, a little elbow grease and some help from WD-40 and.....


the 2 top parts were separated from the 2 bottom parts.

 And this is where the real fun begins!


The metal piping came off pretty easily.  But the roofing flange was the BIG job!  LOTS of scraping!  Tar is not easy to remove (and it's yucky!)


SOOO.....what do I have to show for my efforts?

Well, 3 of these (already have projects planned for them) ....
and the close up (I clearly need to rust up some more)...

6 of these (no ideas yet)....

and the close up (some are still intact, some not)....

3 of these beauties (I'm very excited for the project I've got planned for them)....  

and a little better view (notice the coffe can for size reference)....   

and 3 of these (some fun ideas are floating around my brain!).... 

I did say FUN didn't I?


So considering that I'll be making at least a dozen cool projects from this haul, I think the price wasn't too bad. Sorry I wasn't able to show you any finished goods just yet, it was a project just getting them disassembled.  But I definitely will be sharing more on this.

Midge