Thursday, March 31, 2011

Trying to be Industrious!

Thanks to my handy dandy glass cutting tool, I'm finally able to complete some projects I've been waiting on for a long time.  Like this industrial side table...

I have a few of these, but different sizes.  I don't know if they're wheels, pulleys, some kind of molds, or what!  But they're rustic, beefy, and very industrial looking.      

I've had this guy for quite some time, so he definitely needed a bath, followed by a good rubdown with some oil... 

I had always wanted it for a table, but never had a good vision for a base...until...I picked up a swivel office chair for a couple bucks at the Goodwill.  And then it hit me..duh... 

I not only removed the seat, but also ended up cutting off some of the metal from the chair base -- I didn't want any extra showing through.... 

And I didn't really like the finish on the metal, so I gave it a coating of black spray paint.  Much better.... 

Then I attached the two together from underneath by drilling some holes in the metal and running some screws.....  

TA DA... 

And then, using my new love, I mean my new handy dandy glass cutting tool... 

I cut and added a round piece of glass.  I wanted the table designed so you could see all the parts of the wooden piece....  

I ran a bead of silicone around to give a finished edge....  

And as my daughter reported to me...  

"It turned out super cool!" 
I guess I couldn't ask for a better endoresement than that.  

Midge

I'm linking this up to Becky's Under $100 Linky Party at Beyond the Picket Fence

And I'm linking this up to Donna's Saturday Nite Special Linky Party at Funky Junk Interiors

Tuesday, March 29, 2011

Not just a pipe dream!

So I bought a nifty little tool last week that I just love!  I think it's changed my life!  It cuts glass into circles! WHOA!!  I didn't even know there was such a thing.  But....there is, I have one, and I'm having fun!

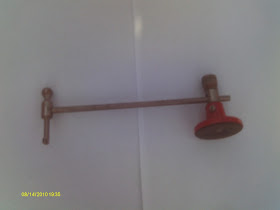
It enabled me to put to use a piece I bought awhile back at an online auction.  Minimum bid is $5.00 (a pretty major investment for a Dutch girl like me), but I liked that it's so industrial, yet had great details, a hint of red, and was round -- I knew instantly what I would do with it.  So I bid, and at the end of the day is was still mine.  YIPPEE! 

It's actually a clamp for piping of some sort.  And pretty substantial pipes at that -- can you read that #?....6"....That's a pretty big pipe. 

And it's designed to open up and then clamp down -- perfect for what I had in mind! 

So I used a cardboard template to make sure to get just the right size I wanted for a circle.  Then I went ahead and used my handy dandy new tool to cut a circle from a mirror. 

In case later someone might unclamp it, I didn't want it entirely glued, so I set the mirror in the bottom half into some epoxy....  

then closed the top half and clamped down the handle.... 

TA DA!!

I hope I've given you something to reflect on.  Junking isn't all just pipe dreaming you know.

Midge

Friday, March 18, 2011

Now you'll know...the "REST" of the story

After completing this project, I probably could use a good REST. 

But first, the rest of the story from last week's "Off with their Heads" post. Remeber this?  

Well, it really started out here.... 

Oh sure, a $5.00 church pew was a pretty good deal.  But did you notice anything funny? .....Yep, it HAD NO SEAT! So I decided to cut it in half.

After that, I had to remove one of the back halves from the side piece.  That's where my post came in to play showing how to separate the two by drilling off the heads of the screws. 

And eventually I did get the one back piece separated from the side. 


I used that half of the back as the new seat and reattached the side piece, giving me a "half" pew. 

There was gluing to be done, gaps to fill, screws to cover, and then lots of sanding.  

After that I gave it a coat of primer. 

I painted it black and painted on the word REST.  It can be interpreted more than one way, especially good for a church pew I think.  

And now you know....the REST of the story! 


Actually, there is just one more thing -- CONGRATULATIONS to Rachel from Somewhere in the Middle!!  She is the winner of my spring giveaway!!

Midge


I'm linking this up to Gail's "Catch-as-catch-can" Linky party at My Repurposed Life

And I'm linking it up to Donna's "Saturday Nite Special" Linky party at Funky Junk Interiors

Saturday, March 12, 2011

I didn't need a push to try this outside-in project!

This is a fun way to bring a little bit of the outside inside.  Not just because this project is for displaying flowers, but because of what they are setting on.  Go on...take a look!...Do you see it?   


Maybe it will help if I show you how this started out...


I've had it for a couple years and just never got around to hanging it up, but I always had a vision for it...


So I first had to get a little reacquainted with Pythagoras and do a little figuring for placement (think a^ +b^ +c^)!  Then I mounted a couple hooks into the ceiling... 


But the real secret to this project is the double pot system (shhh....don't tell...I'm still working on the patent). I first attached a clay pot to the seat of the swing....


Then the ACTUAL pot of flowers sets inside of that....

I think it turned out kind of fun!

Oh, I know what you're thinking, you're thinking about UNDERDOGS!  But the only underdogs for this one is when I'm taking a bath -- it's hanging over my whirlpool bathtub.  

Disclaimer:   I hope you didn't examine any of the photos too closely, but if you did, I know what you're thinking -- YIKES!  But "There's no need to fear!"  (HA -- A cheap Underdog reference).  This is the year I get back to working on my house.  And my master bath is one of the first rooms on my list. I'll keep you posted.  

One more disclaimer:  Sorry about the poor quality of the photos.  I never realized how bad the lighting was in my tub area -- I obviously am not a bathtub reader! 


Midge  


I'm linking this up to Donna's Saturday Nite Special "Bringing the Outdoors In" Linky party at FunkyJunkInteriors 


My "Spring Giveaway" to celebrate my blog redo ends on March 17!  Check it out HERE 

Thursday, March 10, 2011

"Spring" Giveaway to Celebrate My new Facelift!

Notice anything different?...  Yup, I gave my blog a much needed facelift.

I hope you like it!

I'd really like to show it off...SO...I'm hoping you can help spread the word.   And I'd like to thank you in advance by offering a special junky prize for some lucky winner. 

Well, it's not THAT special, but it is FUN!  And everyone who sees them loves them.

And who couldn't use more candles?
Especially ones made from old bedsprings.

Oh, sure, you could harvest some of your own, but do you think you really will? Huh? Do you?

Anyway, here's the deal:

To be eligible just leave a comment on this post (any topic, I'm not picky) for ONE entry. 

Post a link from your blog to let others know about the giveaway for THREE more entries -- let me know in a comment.  

NO entry for being a follower.  I know that's not the norm, but I don't want anyone to follow me to win a prize.  But I'd love for you to follow if you DO enjoy my blog.

The winner will be drawn at random from the entries and receive a set of "spring" candles with your choice of ribbon (typewriter, jute, polka dots, burlap strips).  And I might just throw in a few other junk goodies to boot.  So....are you feeling lucky?

You'll find out on Thursday, March 17.  You have until 3:17 p.m. (EST) to enter.  :)  


Midge

Tuesday, March 8, 2011

Tool School Tuesday: "Off With Their Heads!"

I LOVE REPURPOSING!!  Such a creative endeavor.  And it comes with its own unique set of successes...and problems.  Unfortunately, there's no Junker's manual explaining how to deal with problems when they do arise (hmmm .... note to self).  So.... I thought I'd share a recent problem that I went through.


A current project of mine requires me to separate these 2 pieces of wood.  Usually they'd likely be glued together which means they may easily come apart, or they may bust apart.  However,  these pieces had several large screws holding them together.  YAY!  All I have to do is remove the screws, right? RIGHT?


Well, these screws didn't want to come out.  So, instead of becoming upset, insisting I had to get them out, chasing after screwdriver upon screwdriver, squirting boatloads of oozy stuff that would make no difference, did I mention getting upset?,  I decided to surrender early on and take a different approach.  I didn't need the screws, all I needed was to be able to separate the boards. If they butted together, I could possibly run a sawzall between to cut the screws.  But, as you can see in the picture, the one piece was setting inside the other.  SOOOO...  


If the HEADS of the screws were off, the boards could be separated.  They couldn't easily be cut off, but they could be DRILLED off.  There are 3 different widths of a screw: the shaft, the top of the head, the bottom of the head.  Choose a drill bit slightly wider than the bottom of the head.  Don't know how big that is? -- Guess.   


Then drill away!  You want to have just the shaft remaining in place but the head gone.


Just an extra tip:  You may want to keep a hair dryer handy for blowing out the piling up dust.  Oh, sure, you could simply blow on it.  But do you really want to blow metal dust into your eye?


Ta Da!  Success!  Okay, I still had to work it a bit and do some tapping, but I could not have done that with the screws as they were.  So, what exactly am I working on?  I can't tell yet (and if you already can guess...shhh...it'll be our little secret), but I'm on my way.  

So, if you encounter a problem, you can probably find a solution. You just have to keep your head about you -- so to speak.  :) 

Midge 

Monday, March 7, 2011

I'd go the extra mile(s) for a fun piece of junk!

Look what I spied on someone's curb this morning on my trip into town!...... 

I HAD to have it! Unfortunately, I didn't have my minivan, I was driving my son's car.  So..... 

this is how I had to transport it home!  No rope or bungee cord, no red flag, just one leg caught on the inside of the truck.  OH, BOY.  So I decided to go for it.  I took back roads all the way home.  Much longer route, and dirt roads and potholes (which only increased my anxiety of it flying out), but I could go as slow as I wanted, pick it up if need be, and avoid others on the road -- ;). 

So I got it home safe and sound.  YAY!  Here's the view from the back.  I think it's a section of bowling alley seating.  I love the retroness of it.

However, it is going to need a little love.  Not sure if I'll repaint or unpaint, but underneath the end pieces is a salmon pinkish color.  I do have a few fun pieces to compliment it.  So I think it was worth the extra miles and worry. 

So how about you?  Are there any items you're willing to take any extra crazy ride for?

Midge

Saturday, March 5, 2011

Define bench.....

When you hear the word "bench", your first question may be "What do you mean by 'bench'?"  And for a junker, the next question is probably "And how exactly do I make one?"  Here are some ideas...


Junking 101:  The headboard bench!  Made by cutting the footboard in half (or less) and using as sides by attaching to the  headboard forming three sides.  A front board completes the frame and the seat can either be slats or one bigger board supported underneath.

A fun variation on the headboard bench, this one had identical foot and headboards.  One forms the back and one forms the front with the addition of side boards.  Just need a little measuring and cutting to get the right fit.

   
Headboard, but no foot board?  No problem if it's full size or larger.  Cut it in half to make a corner bench.  Add a third leg in back, a board in front, and you're off and running. 


No beds?  Well, do you have an old dresser?  This friend did.  And we carefully removed the top, cut it down to the appropriate height, and reattached the top to create a functional storage bench from a family heirloom.


An old chest will work too!  This one got some attention and some casters.  The inside is great for storage -- this one has built-in file storage!

Three matching chairs make a great bench!  And they don't have to be great chairs (the middle section chair isn't even really all there -- shhhh...don't tell!) 


One of my favorite bench I've made -- a gossip bench made from old ladders.  Who doesn't love ladders? -- and gossip!!


Looking for something different?  It doesn't have to be difficult.  This easy and fun summer bench is made from a couple camp stools with waterskis attached to the top!

Now, go be creative...define YOUR bench.

Midge

I'm linking this up to Donna's Saturday Nite Special Linky Party at Funky Junk Interiors