Not just repurposing, but BEING repurposed......" if anyone is in Christ, he is a new creation: the old has gone, the new has come." ~~ 2 Corinthians 5:17


Thursday, December 8, 2011

Playing with my mantle -- AND my new camera!

I've been discouraged about my photo quality lately, or should I say lack thereof.
And I finally decided it just HAD to be something wrong with my camera. 
So...I bought a new one!  
WOW!  What a difference!

  So now I'm EXCITED to take pictures, which is good because I have a new project to show off. 
I love my fireplace!  But, we built it with a big hole in the top for our t.v.


Okay, I've got to keep it real -- it usually is more this (tv is on most of the time).
Except before, there were not the side pieces, just the hole. 
I finally added the foldable doors, so when I want that mess out of sight.....


it looks more like this! 
So now I can finally take pictures of my fireplace!
And that means I get to try out a few mantle LOOKS.


 I call this first mantle experiment "Christmas at the cabin".
 Yeah, I know, it's NOT a cabin, it's my house, but that's THE LOOK I'm going for first.
I started by adding a snow shoe with greenery to each door.

 And when the doors are closed, it looks like this.  
The nails to hold the snowshoes are strategically placed so I can place them either way. 
:)


This stockings are made from old wool plaid hunting pants.  
One used the waist band for the top, and the other used the bottom of the leg as the top 
(complete with shoe lacing). 


 I  thought it needed a homey touch, so cut a slit in a few pinecones and inserted some old photos.  
They are nestled among more greenery (I snipped it from my yard)
and added a few tree sections holding votive candles.


 Couldn't resist the poinsettias Walmart had on sale so cheap!
So I placed them in an old fishing creel and minnow bucket.

 
I wanted something that would reflect the reason for the season while keeping with the cabin theme. 
I thought about some kind of garland, but came up with this instead. 
It seems to work!


 So when the doors are open, it looks like this!


Oh yeah, keeping it real -- if the doors are open, the tv's probably on.  


And when I want more of a "photo shoot", it looks like this!


So now I'm off to try a few more "looks" for my fireplace. 
Hmmm.... Hollywood glam?...Pink Ballerina Christmas?... Rudolph & friends?....
:) 
I'm having fun with my mantle....
and with my new camera.

Midge

Wednesday, October 19, 2011

Taking a path less traveled

Remember last post I mentioned this bike for two inspired me?  
Well, it was our surprise wedding gift to my daughter and her new husband -- something they both really wanted.  
We parked it at the reception and it was a big hit, including people posing for photos by it. 
It got me wondering.... 


Where do people get non-traditional items for weddings like vintage bikes and fun signs?  
Can you rent things like that?


 So did I little googling.  
And I found that many businesses have popped up in the last year for just that purpose, spurred on by the recent trend of vintage and non-traditional weddings and the need for renting unique pieces.


 And I had much more to offer than many of the "vintage rental" businesses I discovered!  
Number one common item I noticed -- blue jars! 
(I'm now up to about 100)

 
 So I'm adding vintage rental to my services I provide!  
As far as I can tell, I'm currently the only one in MI! 
So I might even have to do a few road trips, here and there. 
(No problem packing, I have 100 suitcases too)

     
 I don't have quite as many china pieces, 
but I am working on building up my collection.


Same story for my vintage silverware.


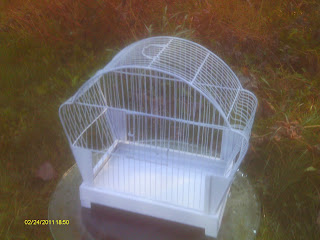
Birdcages seem to be very popular right now. 
I have several of those, in a couple different colors, 
and a variety of styles.

   
 I even have several bird nests to go with them!


 And vintage typewriters are so great for leaving messages for the happy couple, or for displaying photos.


 And vintage cameras are universally popular.


 Cloches are great for display and for decorating throughout a reception area.


 One of many metal boxes/tubs.  Just add some ice and you've got a perfect homespun beverage cooler!


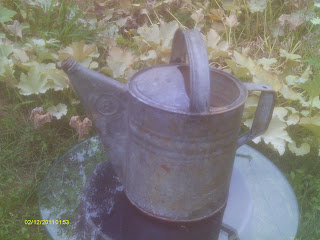
 Of course, it doesn't get much more cozy than a watering can, especially a collection of them filled with flowers. 
(Yup, I've got a "collection" of them)


 Imagine how fun it would be to have a "picnic" wedding!! 
They're becoming more and more popular.  
That's okay, I've got plenty of different baskets to go around!


Of course I've got plenty of basices, too,
like doors, windows, frames, etc. 
I think I see a photo op here!

 
And speaking of photo ops, the rental service will also come in handy for photographers. 
I think something like this could be fun (think baby bump!). 
And actually there are a lot of others that could benefit from a service like this, event planners, film producers, drama directors.  
And I have many more items than are pictured here.

So I guess I'd better get to pedaling
...you never know what's around the corner
...on the bike path less traveled. 
:)

Midge 

If you're worried I won't be doing repurposing projects anymore -- not a chance!!  That is still my first love!! My next post will be SOON and will definitely feature something I've made from junk.  :)

Monday, October 17, 2011

Trying to get back in the loop!

   So...Have you been looking for me?...No?....Good.  
Cause I've been a bad, absent blogger.

And if by chance you HAVE been looking for me...I apologize. 
I got distracted...again.  


You see, at the end of this summer, 
our daughter Becky got married!  
WHICH WAY TO THE WEDDING?


 The wedding took place in a beautiful park, on a PERFECT day. 
Blue skies, warm temps, no humidity!

 
Lots of gorgeous flowers, handpicked by some of us ladies at a local commercial flower farm owned by one of Becky's church members 
-- " Help yourself". And arranged by another.
Such kindness, and such fun!


 Becky and her now-husband, Aaron, live and work in a neighborhood where they're able to assist many of the families and their children. 
So, of course, the little girls just HAD to be in the wedding!
Eighteen flower girls with custom made skirts, 
and t-shirts that say "I'm a flower girl!"


 Groomsmen are ready to go.


 Bride side?...READY!


 This is it!


 Not too many surprises. 
Well, maybe just that the groom was barefoot....
Oh, and that instead of exchanging rings, they had tattooed "rings" onto their fingers earlier that week.   


And  they ended the ceremony with the washing of each other's feet.
Hadn't seen THAT before, but it was kind of cool.  


 "Did we do it?"..."Yep, we did it!"
YAY!!!

Of course, Mom had to snap a few pics of her snazzy brood!


 But I think it's better left to the professionals!


 They seem to know what they're doing.


 Meanwhile, the guests were  heading up for the food and festivities.


 I was able to include a few of my creations to the decore.


 And SOOO many of Becky's friends had pitched in 
to help in SOOO many ways.
Her friend made this cake topper for them!  Adorable!


 Of course there was a lot of fun, laughter, and KICKBALL!


 And dancing!!

It was a great wedding, a lot of fun!
Afterward, the happy couple didn't end up riding off into the sunset happily ever after, but they DID head out for their honeymoom cruise!  
And the bike DID inspire ME down a new road 
-- which I'll share on my next post.


Midge

P.S.  My daughter Becky is quite a remarkable, giving young lady.  We were able to watch a tv news feature about her the other day for her role as a mentor.  She's one of 5 up for Michigan's Mentor of the Year and will find out next week at a Governor's dinner who the winner is. :)  (Just had to brag a little)

Sunday, August 7, 2011

World's Smallest Bathroom -- FINISHED!!

THE DISCLAIMER: 
First, let me just say that though I'm BASICALLY done with my bathroom project, there'll still be some tweaking for some time to come.  So if you see something not quite right, I'll get to it -- eventually.   
Also, I'll probably be changing out the decore at some point too.  But since this is a guest bath (and we never have any guests) I thought I'd try something a little fun.
One last thing, taking photos in this small space was very difficult, I hope you can envision things properly.


THE RECAP:
My husband and I bought our house about 12 years ago -- for $100!  That's because just the house was for sale, we had to move it.  So we moved it, worked on it, moved the family in, worked on it some more, took a pause to catch our breath (even though we weren't done), and never seemed to get back on track.  


So for many years, the space looked like this!  Actually, that's not true.  This is a cleaned up version once I had started my project.  The space was unfinished but the studded walls were there, and I did have a washer and dryer and some storage in the laundry area. 
 
Then, a couple months ago, I got motivated to "Get 'er done!"  So....


I did some wiring.


And I did some plumbing.


And I did some drywalling.  (don't let your vehicle become a stumbling block -- if you cut your pieces in the parking lot they'll fit easily into any min-van!)

And I laid down new flooring.  The space had flooring already but I didn't like it.  So to not spend a lot and to keep the theme of vintage simplicity, I had a sheet of plywood cut into strips (at Lowe's, so kind), stained, whitewashed, sanded, nailed it down.  It might not last forever, but for $12 -- who cares!  And so far -- I LOVE IT!   

Of course, I also painted, trimmed, installed, blah, blah, blah.  But let's get to the good stuff!


THE REVEAL:

This is the right-hand side of the laundry area as you enter the space.  Just enough room for some storage and a stacked (even if it's home grown) washer and dryer.

Or from the other direction, viewing it from the bathroom doorway.  I made some shelves, including a space to store my upright vacuum. 

Above is more shelving.


I was able to attach this rusy, chippy hinge to the wall between the washer and storage areas.  When I need to hang dry something, I simply lower the hinge and insert hanger into hole.  

Other side of laundry area.  Behind the opened door is more shelves for utility storage (light bulbs, gift wrap stuff, gardening stuff, etc.).  And on the wall is a little taste of what's to come.  "Ready for my closeup!"....

  
This framed instruction sheet was from the bundle that inspired my bathroom project.


I bought this cool piece earlier this year for a mere $10.  I love it!

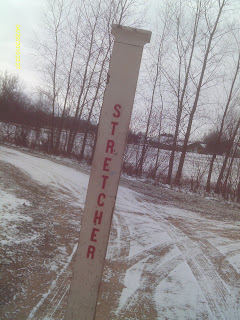
A 7' tower to house a stretcher in case of a mishap at a factory.  The stretcher was still there, too, along with some signs.  

So, as you look into the doorway of the bathroom area (it's on a 45 degree angle), you can see the signs. 

And I placed the tower in the corner and added a hook to serve as a towel holder.


Cool!

And even higher up I placed the stretcher.  Not only is it cool, but now I can store things in the tower.  

I placed the stretcher really high to help with head room.  The space is really tight, and the stretcher is quite big -- it used up every inch of that back wall!


Now that you've got the theme, let's resume the tour!  The bathroom area has a doorway, but no door.  It is set on angle, so you can turn to the right or you can turn to the left.  This is the right!  

The shelf is removable because it tops the bump out area that houses some of my laundry hoses.  I'll probably accessorize it later, but for now I enjoy looking at the antique doctor bag mounted on the wall above. 


It's not just cool looking....it's functional!!


Moving to the left side of the doorway, I bought this vintage sink at auction for $5 several months ago.  This is probably what spurred me to finally finish this space.  I was able to find the vintage faucets at a salvage yard for another $5.  I might tire of the old fixtures in a couple years, but for now it's fun.


Came across this vintage medicine chest in one of my junk piles and placed it above the sink.  It seems to work.

So, like I said, I do have a bit of tweaking and decorating to do yet, but for the most part I'd call it FINISHED!!

Probably the only room that IS all the way finished, but I'm not going to stop now.  It kind of motivated me to keep going.  Generally, I'm much better at starting than finishing.  Proabably true for a lot of people.  I'll work on staying focused.  And more importantly is staying focused on what's really important:

     "I have fought the good fight, I have finished the race, I have kept the faith."  ~~  2 Timothy 4:7

THAT'S the kind of finishing I hope one day to be remembered for. 
Peace.

Midge

I'm linking this up to Donna's Saturday Nite Special Party #93 at Funky Junk Interiorsfunkyjunkinteriors.blogspot.com